Replacing the Micro SD Card on a DoW100 Monitor
Please note: The following instructions are for the current version of the case used for the DoW100. Older versions of the case may differ slightly in finding the location of the lights and accessing the SD card, but they should still be easy to find.
1.Power down the DoW100 Monitor and then completely unplug the unit from power.
See Powering Up and Powering Down for instructions on how to turn the Operating System off on your DoW100.
2.Ground yourself to a proper earthing ground to eliminate the possibility of electrostatic discharge. Electrostatic discharge may destroy components of the DoW100.
3.Extend the Monitors Stand (bottom) till it is fully open and lay the monitor on its face (screen).
4.We suggest laying the monitor on a non-static/grounded material such as a rubber mat.
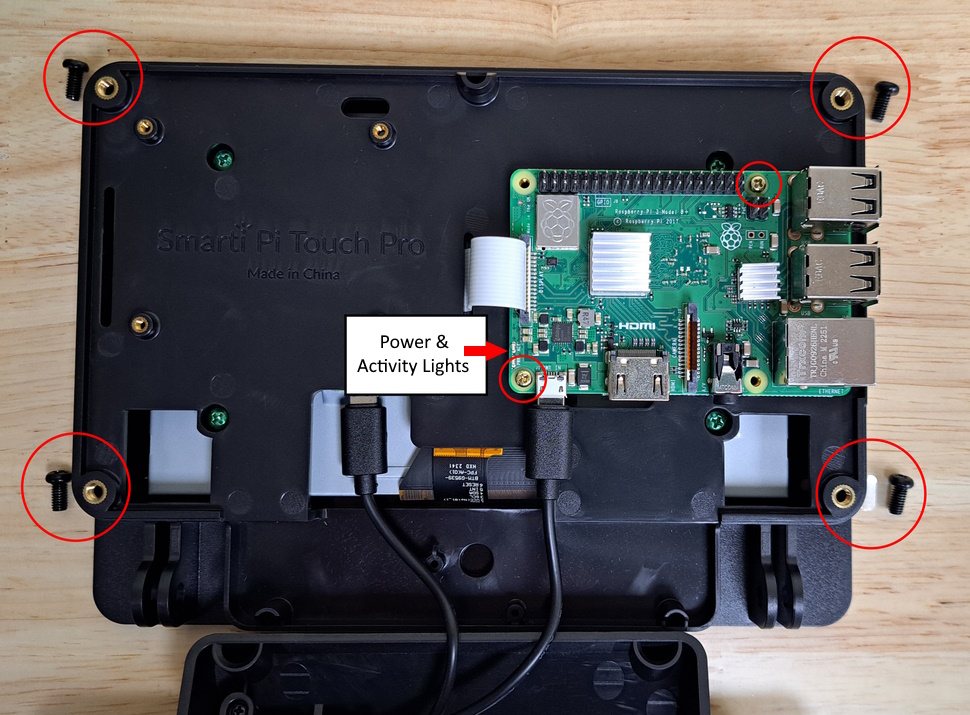
5.Remove the 4 black screws from the corners of the case.
6.The Raspberry Pi should now be exposed. A ribbon cable is connected from the Raspberry Pi to the screen. Be careful as to not bend or destroy the ribbon cable as it is delicate.
Note: The ribbon cable is removable from the raspberry pi, but we suggest leaving it attached.
7.Remove the 2 gold screws holding the Raspberry Pi onto the case.

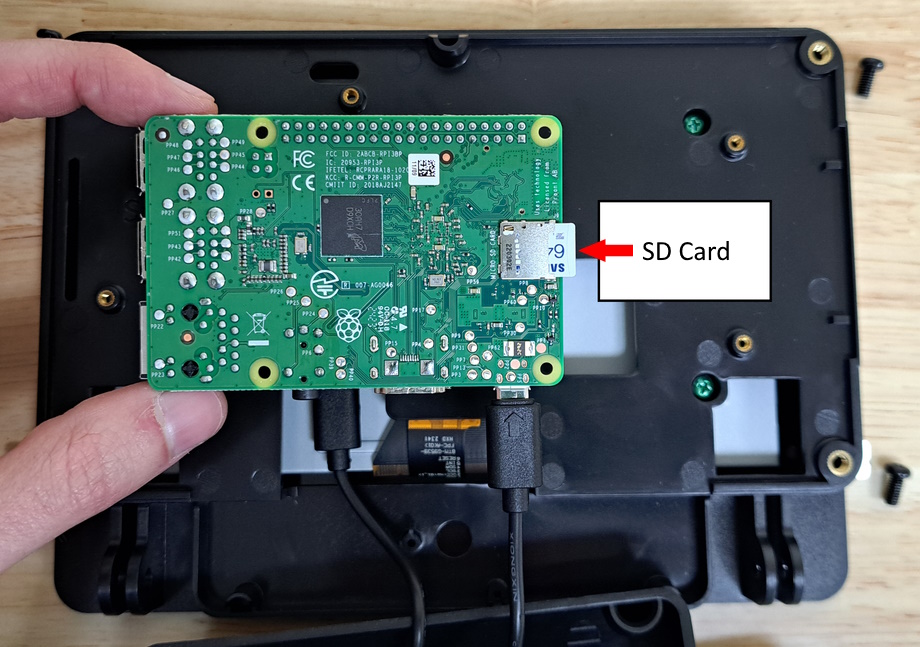
8.Slowly and carefully lift the Raspberry pi from the Case, pivoting the pi on the side with the ribbon cable.
9.With the rear of the Raspberry Pi now exposed, one should be able to see the SD card slot on the rear of the Raspberry Pi. Carefully slide out the old SD card and insert the new one. Be sure not to bend the card when removing or inserting, and make sure it is seated in all the way when finished

10.Pivot the Raspberry pi back into its proper place, again making sure not to mar or damage the Ribbon cable. Replace the 2 gold screws to secure the Pi to the case.
11.Replace the rear cover with the 4 black screws.
12.Replace the power cable back into the right side of the device.
13.Boot the DoW100 to check functionality.
NOTE: When the DoW100 first boots, a rainbow screen and then the Scopos logo should appear.
14.Run the Take Ownership process on the Monitor again using your Take Ownership USB.