After purchasing and downloading the SD image from our webstore, follow these instructions to write the file to your microSD card.
Extracting the Image from the .zip File
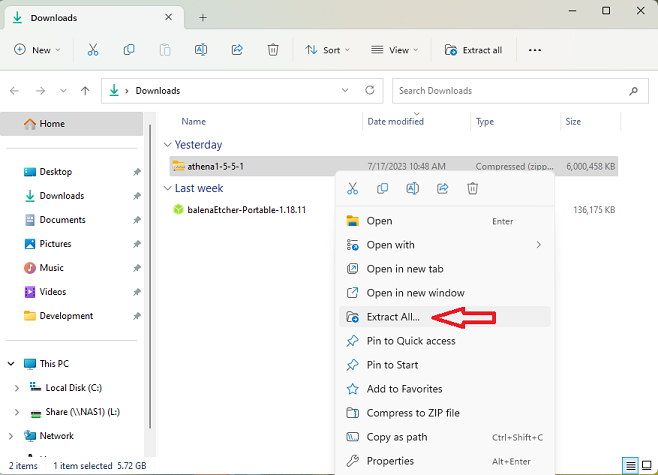
Right-click on the downloaded .zip file (will have the name format athena+version such as athena1-5-5-1) and in the menu, select "Extract All..."
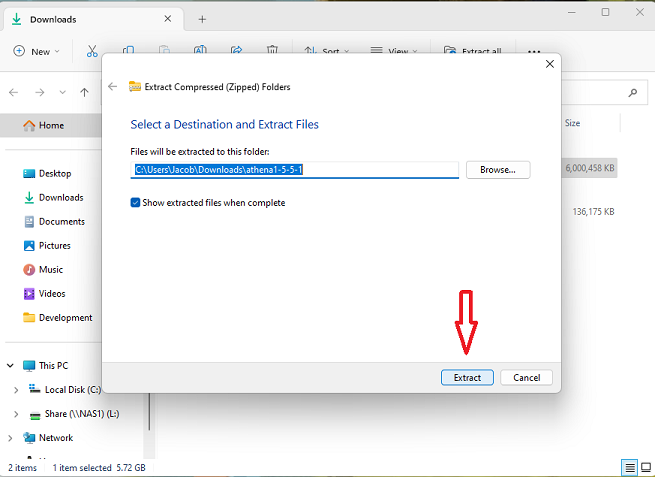
We recommend extracting to the default folder populated in the destination field. Click "Extract."
Wait for the process to complete. This may take a while depending on your computer's processing power.
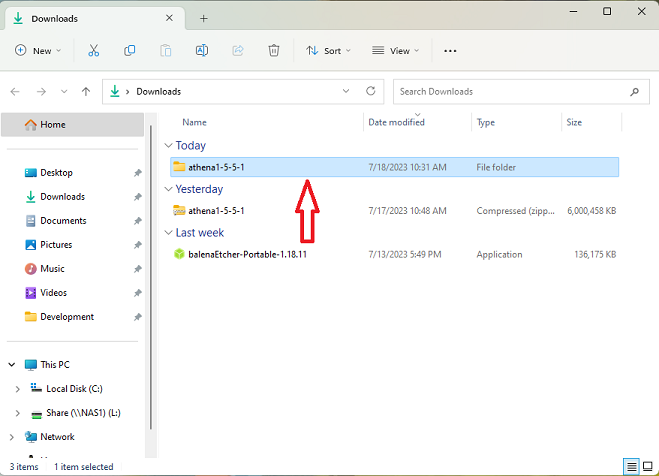
Back in your downloads folder (or wherever you may have manually chosen to extract the file to), you will find a new folder containing the full extracted .img file. It should be approximately 16 gigabytes.
Writing the Athena .img File to Your microSD Card
Use a 3rd party tool to write the Athena .img file to your SD card. This guide will show how to use two popular and simple tools, Balena Etcher and Rufus. They can be downloaded from their respective websites below.
https://etcher.balena.io/#download-etcher
We recommend to download and use the "portable" versions of the software to skip the step of installing them on your computer. With the "portable" version, you may just run the software without installing. You may instead choose the installable versions if you wish.
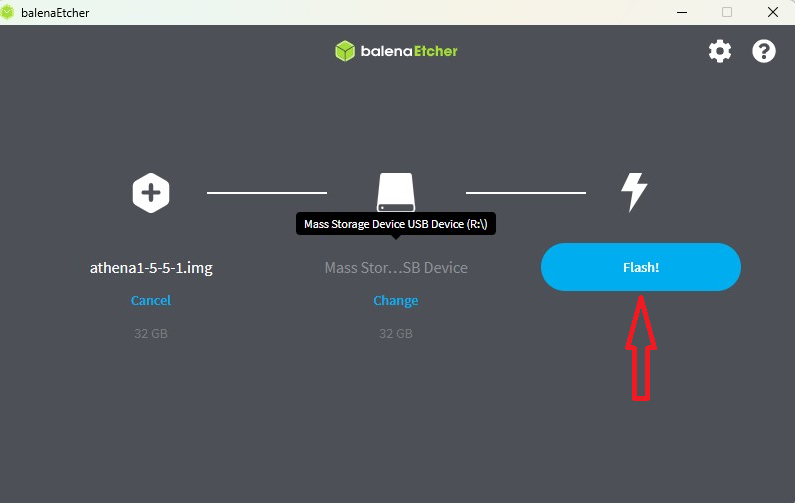
Balena Etcher
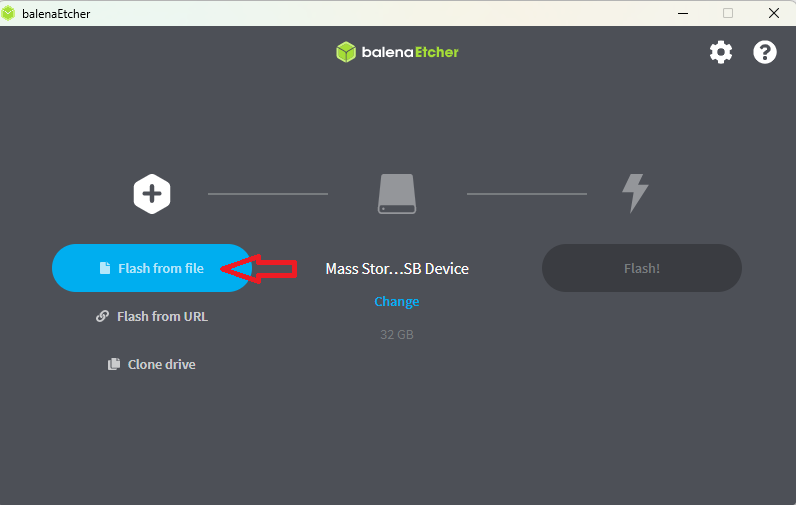
Run the downloaded executable file to open the Balena Etcher software. Click "Flash from File" and proceed to the location of the Athena .img file we extracted earlier. It is important to choose the file we extracted earlier with the .img file type that will be approx. 16 gigabytes. Balena Etcher will not be able to use the downloaded .zip file by itself.
Next, choose your microSD card as the destination. Here, you can see the selected one is called "Mass Storage Device USB Device" and has the path (R:\). Your name and letter may be different, which is fine and normal. Just make sure to choose the proper device, as any preexisting data on it will be erased during the write process. Then click "Flash!" and wait for the process to finish. This may take a while depending on your computer's processing power.
*NOTE: The program may present a Windows User Access Control prompt upon clicking "Flash!" and ask for administrative privileges. Provide the credentials if necessary and click "Yes."
After the write process has completed you are now ready to install the card into any Athena device!
*NOTE: You must re-run the Take Ownership process on any Athena device after swapping out the SD card or factory resetting, using your provided USB key with your account's credentials.
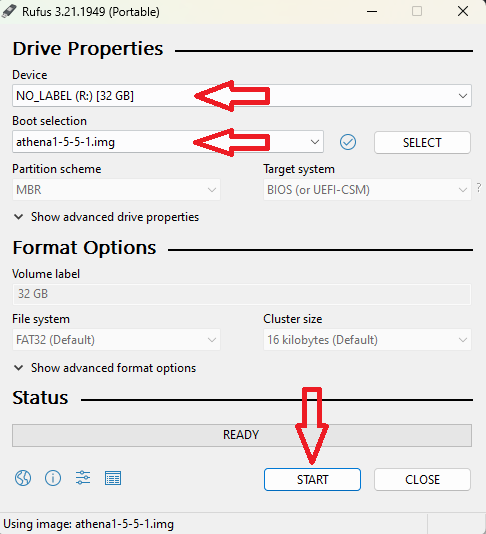
Rufus
Run the downloaded executable file to open the Rufus software. For the "Device" field, choose your microSD card. In this example, you can see ours is named "NO_LABEL" and has the path (R:\). Your name and letter may be different, which is fine and normal. Just make sure to choose the proper device, as any preexisting data on it will be erased during the write process.
*NOTE: The program may present a Windows User Access Control prompt upon opening and ask for administrative privileges. Provide the credentials if necessary and click "Yes."
Next, in the "Boot Selection" field, make sure to choose "Disk or ISO Image" in the drop-down field. Then, click the "Select" button and proceed to the location of the Athena .img file we extracted earlier. It is important to choose the file we extracted earlier with the .img file type that will be approx. 16 gigabytes. Rufus will not be able to use the downloaded .zip file by itself.
Next, click the "Start" button at the bottom. Do not change any of the default settings elsewhere in the program before clicking "Start." This may take a while depending on your computer's processing power.
After the write process has completed you are now ready to install the card into any Athena device!
*NOTE: You must re-run the Take Ownership process on any Athena device after swapping out the SD card or factory resetting, using your provided USB key with your account's credentials.