After physically setting up your Athena At Home Target and Monitor, the next step is to link the equipment to your Result Center account. The steps to link them are done online and with a USB thumb drive.
1. Log in to the Result Center
Using a desktop or laptop PC (Mac or Windows) open a new browser to:
https://rezults.scopos.tech/Identity/Account/Login.
Log in using your Result Center account. HINT: Your Result Center account used to be called your Orion Mobile App account. The two are the same thing, and you may use the exact same credentials for both. You may also register as a new user.
2. Accept the End User License Agreement
Read carefully and review the End User License Agreement for Athena at Home. When you are ready check the "I agree to the terms and conditions" and click Next. Do not accept these terms if you do not agree with them.
3. Configuration (part 1): Generating the AthenaPreOwned.json File
In the Configuration step you will generate the "AthenaPreOwned.json" file. This file will contain information your Target and Monitor needs to know to connect to your home WiFi network and then the Internet. It will also mark your equipment as being owned by you.
•Wireless Network: Type in the SSID of your home wireless network. Your Target and Monitor will use this information to connect.
•Wi-Fi Password: Type in the password of your home wireless network. Your Target and Monitor will use this information to connect.
•Confirm Password: Re-type in the password of your home wireless network.
•System Password: Your Target and Monitor run off of a variation of Linux called Rasbian Pi OS. The System Password will be the password set for the system's authenticated user (pi). Choose a password that is a combination of lower case letters, upper case letters, and numbers.
•Confirm Password: Confirm the password you want to use for your system user.
•Time Zone: Select the time zone that you are in.
Click "Next" to generate and download the AthenaPreOwned.json file.
4. Configuration (part 2): Installing Credentials on your Target and Monitor
After clicking "Next" in step 3 above the AthenaPreOwned.json file will be downloaded to your computer's Download directory.
1.Insert a USB Thumb Drive into a free USB port on your computer. You may use the USB Key provided with your At Home Resource Kit or one of your own.
2.Using File Manager (Windows) or Finder (Apple) move the AthenaPreOwned.json file to the root of your USB Thumb Drive.
3.Eject the USB Thumb Drive from your computer.
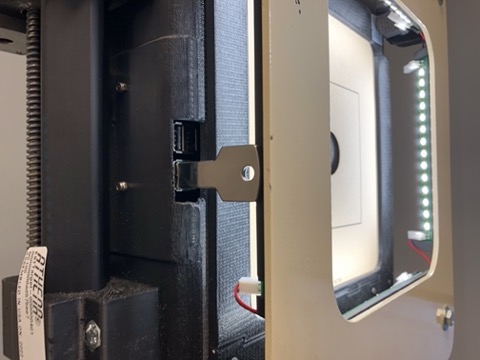
4.Insert the USB Thumb Drive into your athlete Monitor (we do recommend configuring the Monitor first).
a.When the USB Thumb Drive is inserted, and pop up log window should appear. It will indicate to you what the Monitor is doing. It will first attempt to connect to your WiFi and then connect to our cloud network to download it's needed files.
b.If successful the process will take about 30 seconds. When the pop up screen disappears, it is safe to remove the USB Thumb Drive from the monitor.
c.If successful, after about a minute, the athlete monitor user interface will appear. You may now move on to the Target.
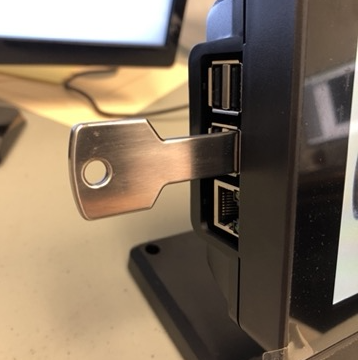
5.Insert the USB Thumb Drive into the EST Target.
a.When the USB Thumb Drive is inserted into a Target (when the Target is in a factory reset state), the Red and Green lights will remain on, indicating it is working. On success the green light will stay solid and then turn off and reboot.
i.In the event that the target encounters an error, please consult the Troubleshooting Guide.
b.The entire process will again take about 30 seconds to complete. Then it will be safe to remove the USB Thumb Drive and return to the Athena Set-Up Wizard on the web.
5. Status Check
The Athena Set-Up Wizard will automatically be checking for you when your Monitor and Target comes online. When both have gone online the Set-Up Wizard will move to the Online state.
6. Online: Hint you're ready to shoot
The final step in the setup process will happen automatically. In this step the Target and Monitor pair up with each other, allowing them to communicate over our cloud network. When this process is complete the monitor will read "Initial Practice of FP 1".