"Camera Calibration" is the process of measuring a camera's lens curvature and plate. This process is essential for accurate scoring, without it images will be distorted and unsuitable for scoring. All NC models are calibrated at the factory before being shipped to consumers. Camera Calibration is generally not needed unless a camera had to be replaced or recommended by Athena's support team.
Process Overview
Camera Calibration is done by taking a series of photographs, from different angles and locations, of a "calibration board." About 20 photographs of the calibration board are needed for a good calibration. After the photographs are taken and internal process measures the distortion of the lens and records these values.
When taking the calibration photographs it is important to move the calibration board around the field of view of the camera, and angle the board. This more angles and locations you can give the calibration process the better the results. If instead you keep the board at a static location for all photos, the calibration will not be as good and may result in image distortion.
Physical Access to the Target
To take calibration photos you will need physical access to the NC model target; no one should be shooting while you are performing these steps.
It is best if you have a good view of Orion or the paired Monitor, this way you can see the calibration Images the target is taking.
Be sure to know how to flip the camera arm up, pointing the camera away from the aiming bull. On older NC models, with a curved camera arm the camera arm rotates at a 45 degree angle (towards 10:30). On newer NC models with a squared camera arm, the camera arm rotates up (towards 12:00).
Calibrating
Read through all of these instructions before starting.
Step 1: Starting Calibration
There way to start the calibration process is from the Target's paired Monitor. Once the calibration process starts, it can not be stopped.
Starting Calibration from the Target's paired Monitor
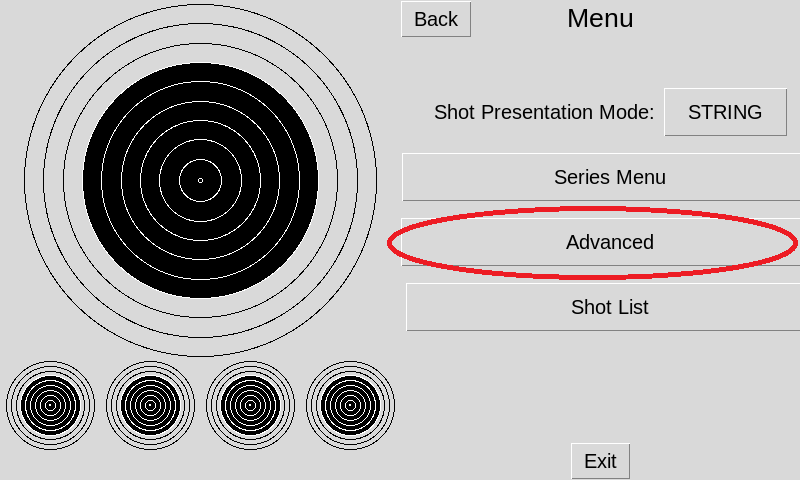
select on Menu -> Advanced -> Calibrate. The Calibration form will open. select on Start Calibration.

The Target's Red X and Green O will light up for four seconds, indicating calibration is about to begin.
Step 2: Flip the Camera Arm Up
Flip the camera arm up, so it is pointing away from the aiming bull. See "Physical Access to the Target" to learn how.
NOTE: It is OK if the Red X flashes a few times while you flipping the camera arm up.
Step 3: Take Calibration Images
Using the Calibration Board hold the board 20 to 25cm away from the camera. Hold the board so the top of the board (with the QR Code) is at the top of the taken images. You may view the images in Orion or the Monitor to verify.
Hold the Calibration Board still until a photo is taken. When a photo is taken either the Green O will flash, indicating a good calibration image was taken, or the Red X will flash, indicating a bad calibration image was taken. Athena needs about 20 good photos to have a successful calibration.
After each image is taken, move the board around the field of view, and or change it's angle slightly.
When calibration is complete the Green O will flash rapidly multiple times, indicating Calibration was successful. Or, the Red X will flash rapidly multiple times, indicating calibration was not successful.